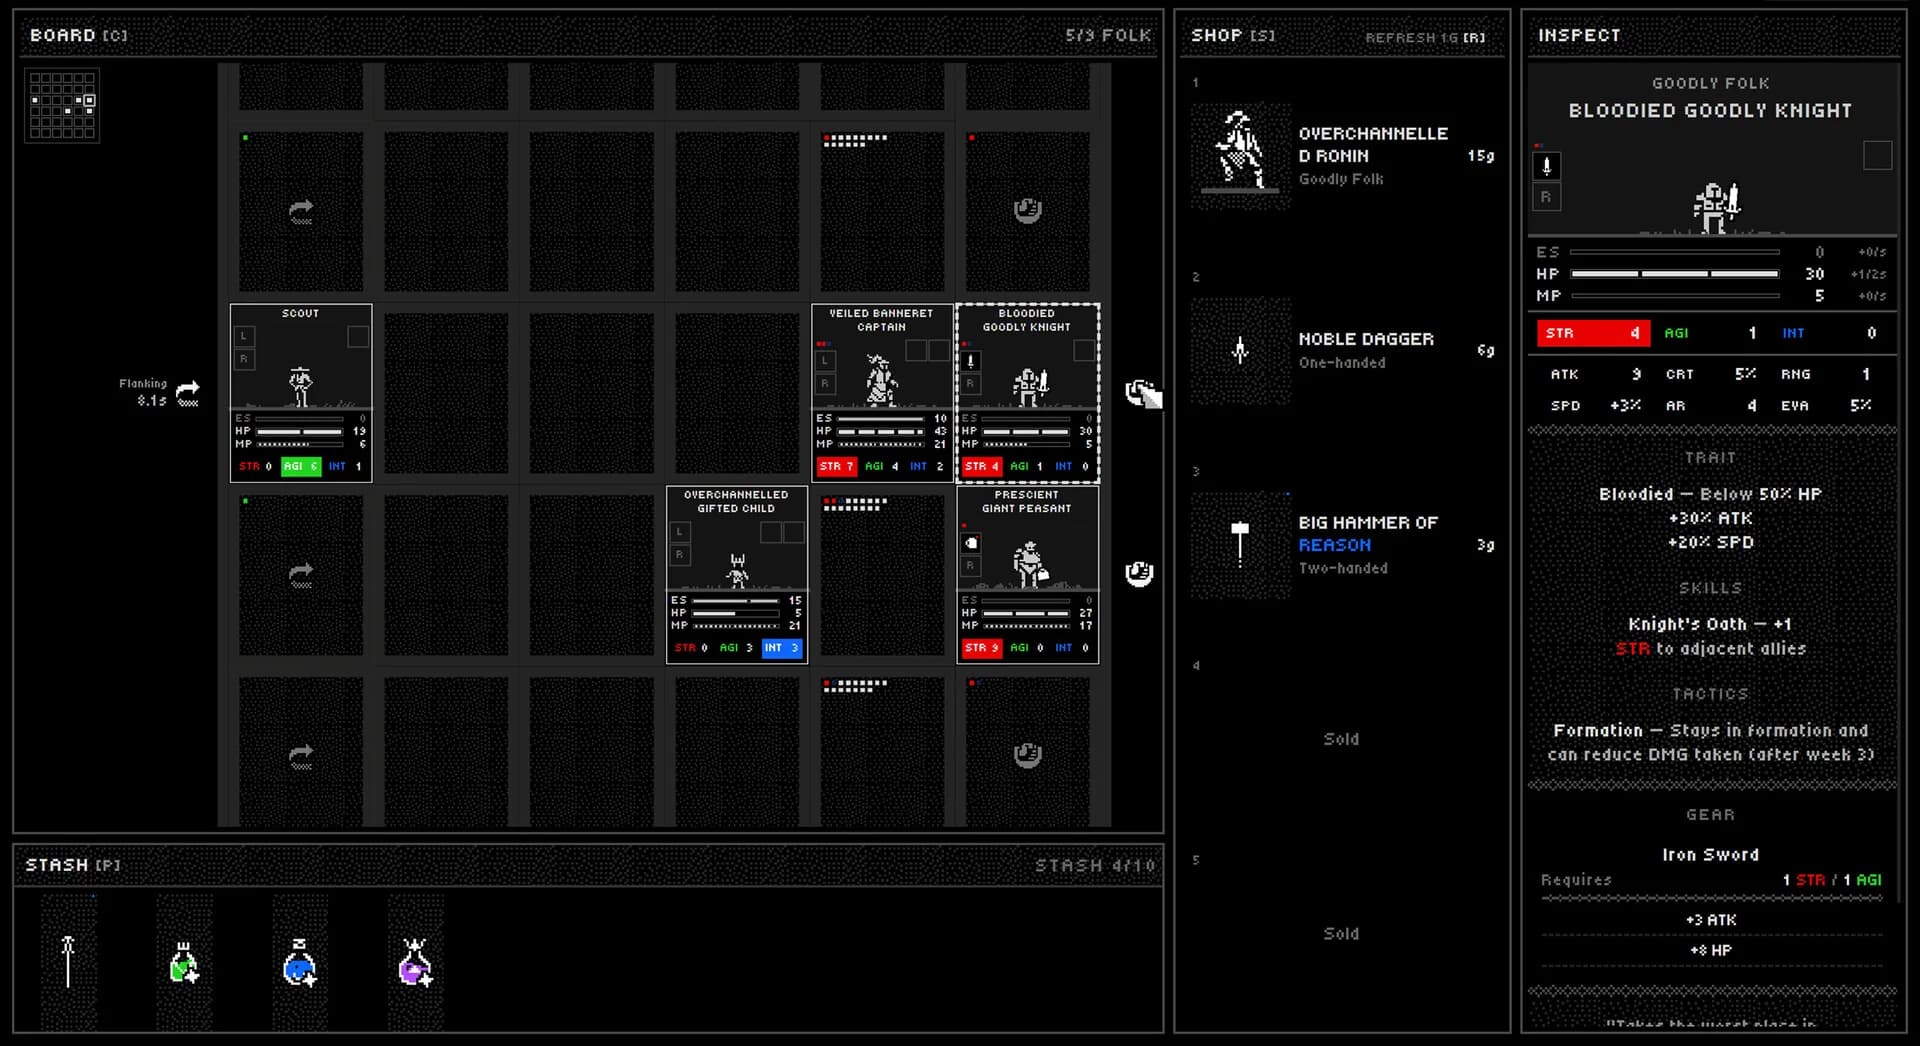
Place a unit for its published tactic, range, adjacency effects, and the opposing line—not only for its largest number. Formation, Backline, and Flanking describe different battlefield behavior, so read the source card before locking a cell.
Start with the tactic on the card
The current public card sample exposes three tactic labels. Formation units stay in formation and can reduce damage taken; Backline units prefer the rear; Flanking units can enter combat from behind enemy lines. These are behavior labels, not universal promises of safety, damage, or target access.
Goodly Knight and Portly Knight are the verified Formation examples in this archive. Archer and Wizard are verified Backline examples. Skeleton Child and Skeleton Dog are verified Flanking examples. Open each Unit record to see the related Trait, skill, range, and capacity before assigning a role.
- Formation: keep the line readable and check which ally is next to whom.
- Backline: check range and protection before assuming the rear is safe.
- Flanking: check the enemy board and survivability; rear entry does not guarantee a useful target.
Use rows to control who absorbs pressure
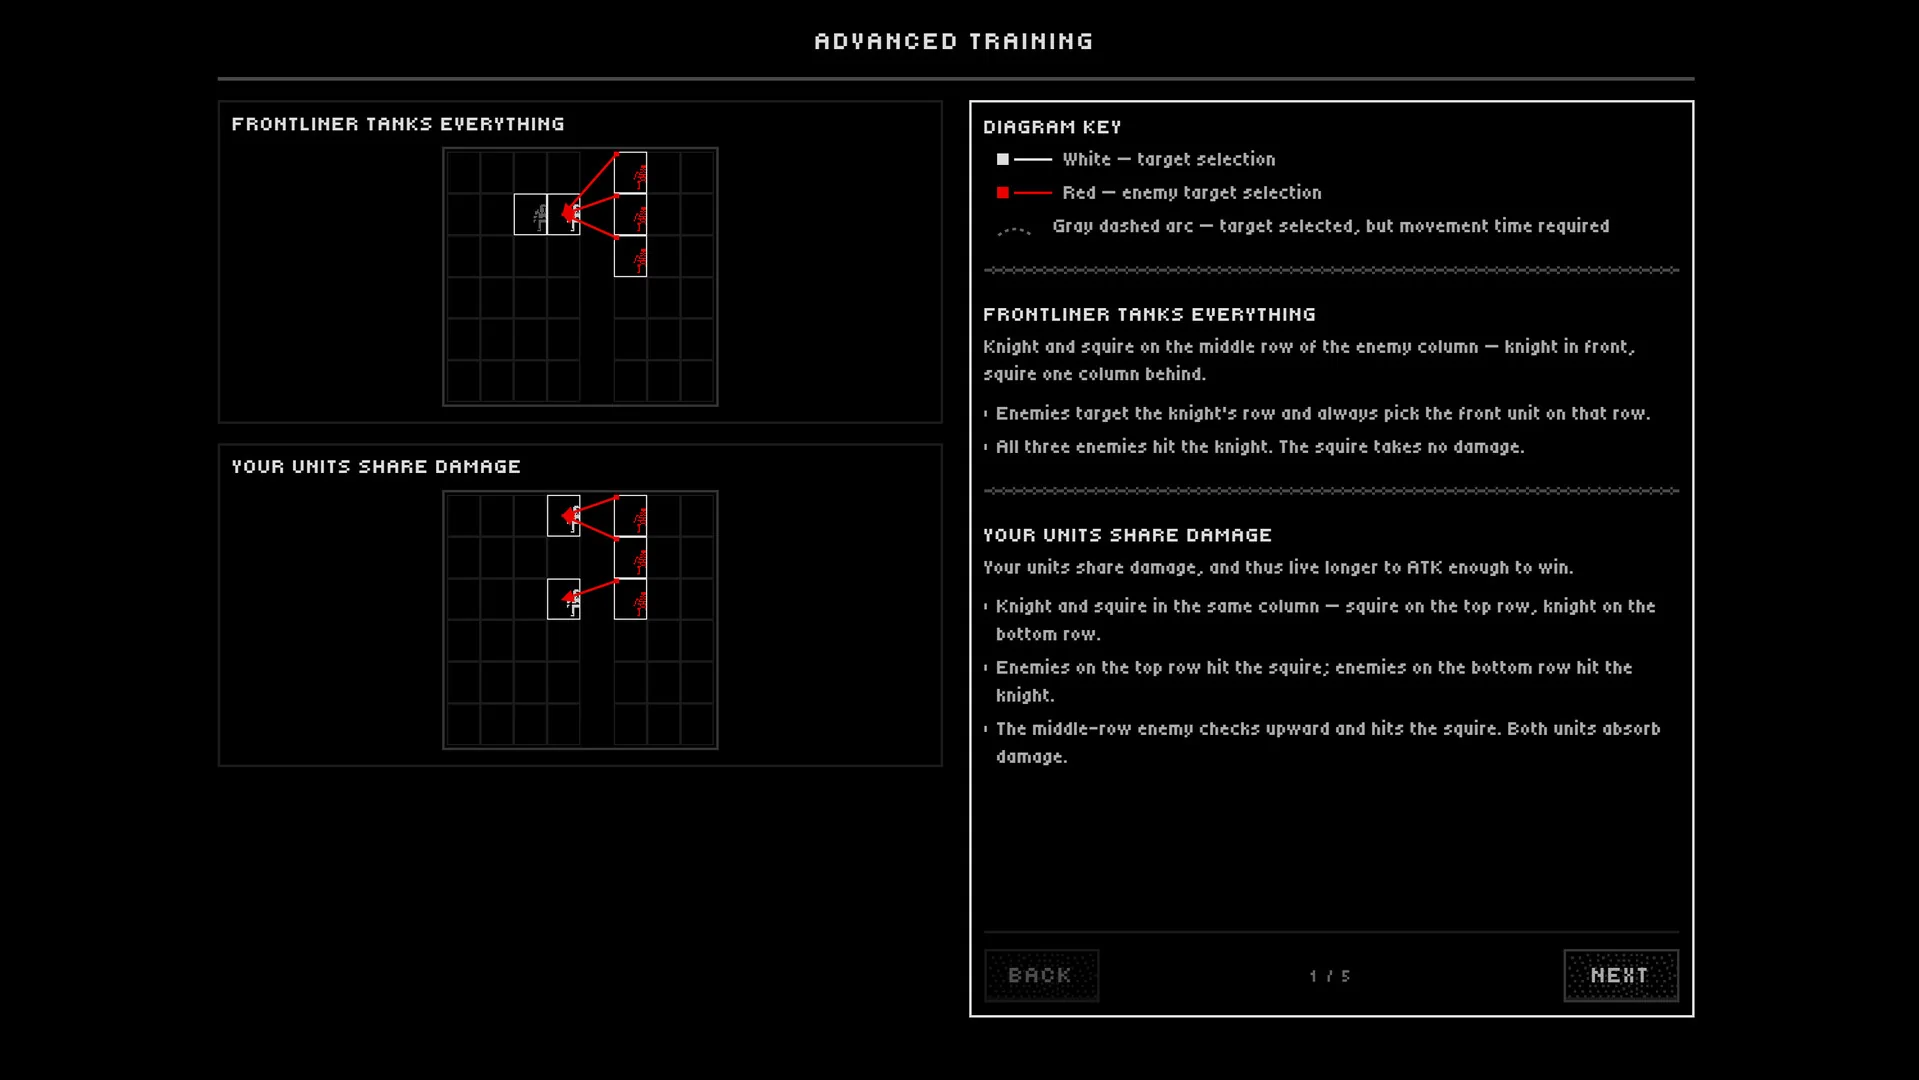
The official advanced-training screen demonstrates that row placement changes which friendly unit is selected by enemies. A front unit can absorb the pressure for a unit placed behind it; moving the pair into separate rows can make both receive attacks. Read that visual as a placement lesson, not as a universal damage formula for every encounter.
Before confirming a board, inspect the opposing line, identify which row is exposed, and decide which unit you expect to take contact first. Then compare that expectation with the unit's HP, ES, AR, range, and tactic on its own record.
Check range and target selection together
RNG is the public card's attack distance, but range only matters together with the line, tactic, movement, and available target. The Archer's verified card lists RNG 3, while the Wizard's public card has a Backline tactic but a different card profile. Read the full record before using a generic ranged or caster label as a placement rule.
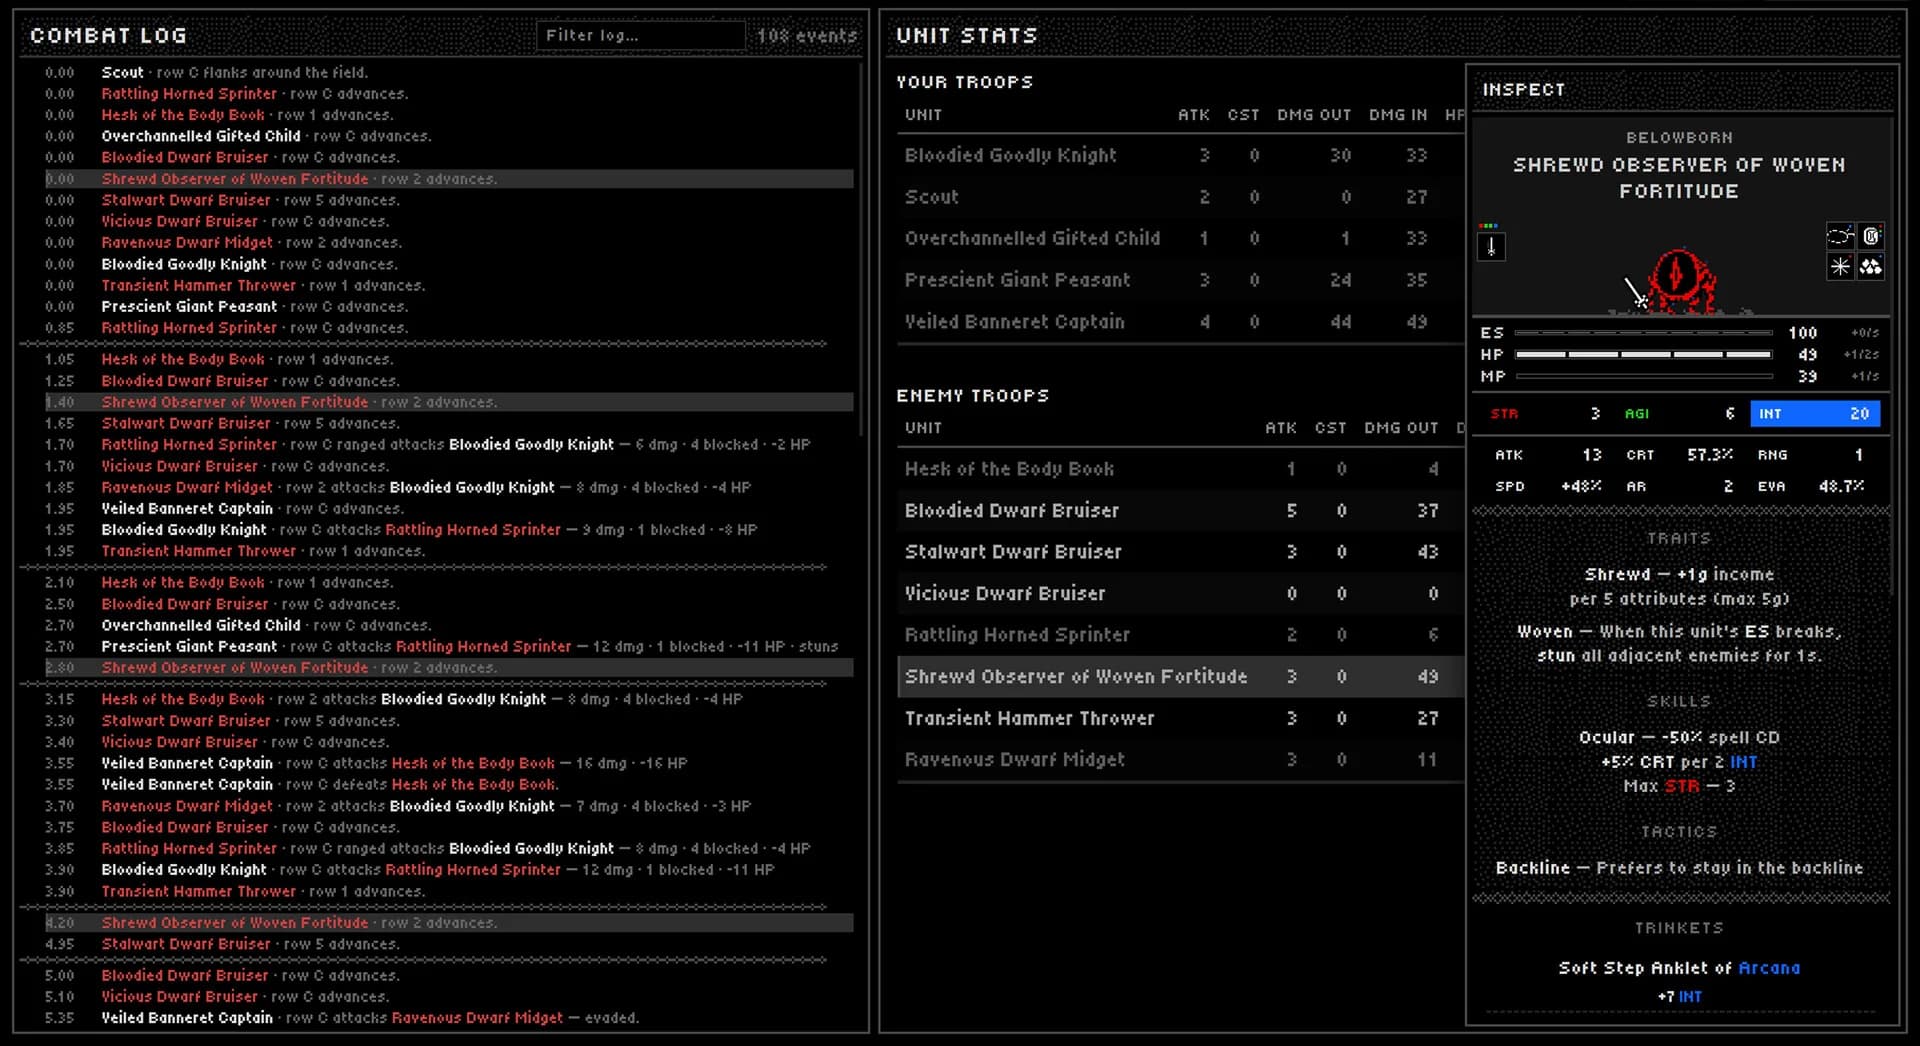
The combat log and inspection view are useful after a battle because they let you compare your intended target access with the observed board. A unit that looked protected at placement can still become exposed when the opposing line, movement, or adjacent support changes.
- Read RNG beside the tactic rather than in isolation.
- Check whether the intended target is actually reachable from the selected row.
- Use the inspection record to separate a placement mistake from a guess about a stat.
Protect adjacency value
Some verified skills and Traits refer to adjacent allies. Goodly Knight's Knight's Oath grants STR to adjacent allies. Skeleton Child passes half of hand-gear benefits to adjacent allies while receiving none of those hand-gear benefits itself. Moving either unit can therefore change the value of the same equipment purchase without changing the item.
Choose the intended beneficiary before equipping. If an adjacent effect has no useful neighbor, reposition first instead of treating the printed bonus as automatically active. The card links are the source for the exact effect and any listed limitation.
Treat a flank as a board question
Flanking means a unit can enter combat from behind enemy lines in the current public card wording. It does not identify a guaranteed target, a safe return path, or a successful kill. Skeleton Child and Skeleton Dog both carry the verified Flanking tactic, but their other card text and the opposing board still determine whether the entry is useful.
Before forcing a flank, inspect rear-space availability, enemy range, and whether the unit can survive long enough for its Trait or skill to matter. Do not weaken the rest of a formation merely to create a rear entry that has no confirmed target.
- Identify the exposed target before depending on a flank.
- Check whether the rear space is contested or covered.
- Compare the flanker’s survival resources with the expected contact.
Turn the idea into an editable board
Use Builds only as visible starting arrangements: they show a board, roster, equipment goals, strengths, and weaknesses, then open in the Company Builder for revision. A build is not an official composition and does not prove a win rate, but it gives you a concrete hypothesis to inspect.
For a long move in the Builder, select a record to carry it, scroll normally, and choose a valid target cell. Keep the actual game and source cards as the final authority when a public card, live board, or newer patch conflicts with a planning assumption.